Industrial Dresser: Before & After

Wednesday, February 25, 2015
You might not be surprised to hear that this big 'ol beauty was headed to the garbage. 

I'm pretty sure it had lived a full life! A stranger on Facebook messaged me and asked if I wanted it- it happens all the time! Of course I said yes! 
When we brought it home I never second guessed its potential-  although my husband thought I was crazy! The top and sides were completely worn and had major holes and wear in them,  as well as the drawer fronts looked a awful sight, and all those missing knobs! It's hard to tell from this picture, but there was only a few drawer fronts that the glass was still intact- 4 out of 6!  But besides all that is was solid wood construction and I liked the shape! 

First thing I did was take out the glass from the drawer fronts and then picked up new knobs from Home Depot. Then we cut new sides from bead board and cut a new top from a nice piece of hardwood. Then he sat in my garage for several weeks waiting to be done!

I was able to convince my friend that she wanted this ugly thing- because I knew once it was done it would be perfect in her sons room! And She trusted me! All she had to go off was the picture above... and some serious convincing!

First I gave the drawer fronts 2 good sanding sessions, and 2 good coats of paint (with sanding in-between), I then had my husband cut pieces of Diamond plate to fill the holes in the fronts. I knew I really wanted it to have a industrial look. 

After the second coat of paint the drawers looked a million times better! 
Then we stated piecing it all together. We added the sides, trim on the base to make it sturdy and add wheels, then trim on the top, and of course the actually top piece. The whole frame is basically new, we secured a lot of the inside frame work and made sure all the drawers were in good sliding condition. It might not seem like a lot- but it was! It took us a few weeks to get it into shape!
After filling in all the nail holes and waiting for glue to dry I gave it all another good sanding .
 My favorite part about the whole thing is the wheels! It makes it much easier to move around but also makes it looks so good! 
I did have to give it all another good coat of Premier Decor Enamel Black Paint from Scotty's here in Rigby, it is a water base enamel and dries much harder than water base acrylic paint. I love it for anything that will get heavy use, it is super easy to clean and leaves a great sheen, and it sprays like a dream! (It's like a oil base paint without the mess of oil.) 

For the top finish I stained it a light grey, then went over it with a walnut stain and quickly wiped it off. It left a great worn look. After a good coat of poly and dry time I was finished. 


 I couldn't wait to get it over to its new home! Im pretty sure any boy or man would want this in their home! (My husband asked several times if we could just keep it for storage in our garage! I kept telling him it's to nice for the garage!) 

Moral of the story: Feel free to send me your furniture garbage! 

A Chair and Some Before & Afters

Friday, January 30, 2015

Isn't it fantastic?!!
Upholstery is something that has always intimidated me! I left those projects to my mother!
Once I read up on it- and had some major fails!! A very painful tetanus shot and I learned the hard way to always wear rubber gloves! Besides that I am starting to love upholstery!
I will admit that I am still learning and sometimes I want to throw the piece across the room! But for the most part I actually like doing it. It is a great way to relieve stress!
And the AFTER's are always so satisfying! 
For this chair we started here... 

 She might not look to bad... but she SMELLED awful!! I think she might have been a cat bed/ GROSS! I'm not a cat person.  So the first thing I did was rip all the fabric off and burned threw it out. (Then took a couple showers.) I didn't even keep the foam or backing as a template. I couldn't. 
I did keep the base piece of wood, but that was it. 

Then I sanded and sprayed all the wood a nice matte black. It made all the difference. I'm really starting to love black again! 
 The poor thing sat in my garage for months. Between life and everything else she was constantly put on the back burner. Then one day I woke up in the mood to finish it! I couldn't wait! 

I cut the foam and batting and got her all stapled up nice and tight. Then attached the back. 
 Then I was stuck. 
Buttons are hard! And they are a killer on your fingers if you try and do them yourself! I had some button molds on hand and tried over and over to make them work, but for whatever reason- the material was to thick or something- they wouldn't take. My fingers had blisters and my hands looked like they had gone through a shredder!! I was a little frustrated so I put the thing to the side and had to wait a few days to get back to her! 

Then one day I drove past a store in Idaho Falls called "The Upholster Center"- I went in and asked how much to do buttons, .80 cents, What?!!! Why was I killing myself!! So they made me a bunch and I was on my way! Ive also been back a few times since and these guys are amazing to work with! 

The back cushion took much trial and error, but when I finished she looked amazing! 
I couldn't wait to get the cording on and her all finished up! 
I had a hard time letting her go! Even my husband was impressed!


I couldn't be happier with how she came together! And I couldn't wait for her new owner to come get her! I was like a proud parent! 
 I'm still on the hunt to find her twin sister to keep for myself! 

 Anyway, if you dont follow me on INSTAGRAM you should! I post most of my updates there along with lots of Before & After pictures! You can also search #wpfm to view past projects!
(Instagram: ranandanntaylor)
as well as on Facebook: whiteplacefleamarket
  
Like this oak desk I did for a teenage boy who's only request was... Blue. 
 And these end tables that almost ended up at the DI! Good thing one Granddaughter knew they would look fantastic painted! 

 And of course, what is a lovely lady like this to do besides be painted a nice fresh coat of Ivory and gifted some shiny new jewels? I think she looks 20 years younger. 


This time of year I am taking new orders as well as wrapping up a bunch of ones! 
Let me know if you would like a estimate on a project!
And- We can pick up and deliver when needed! 

A Piano

Tuesday, December 9, 2014
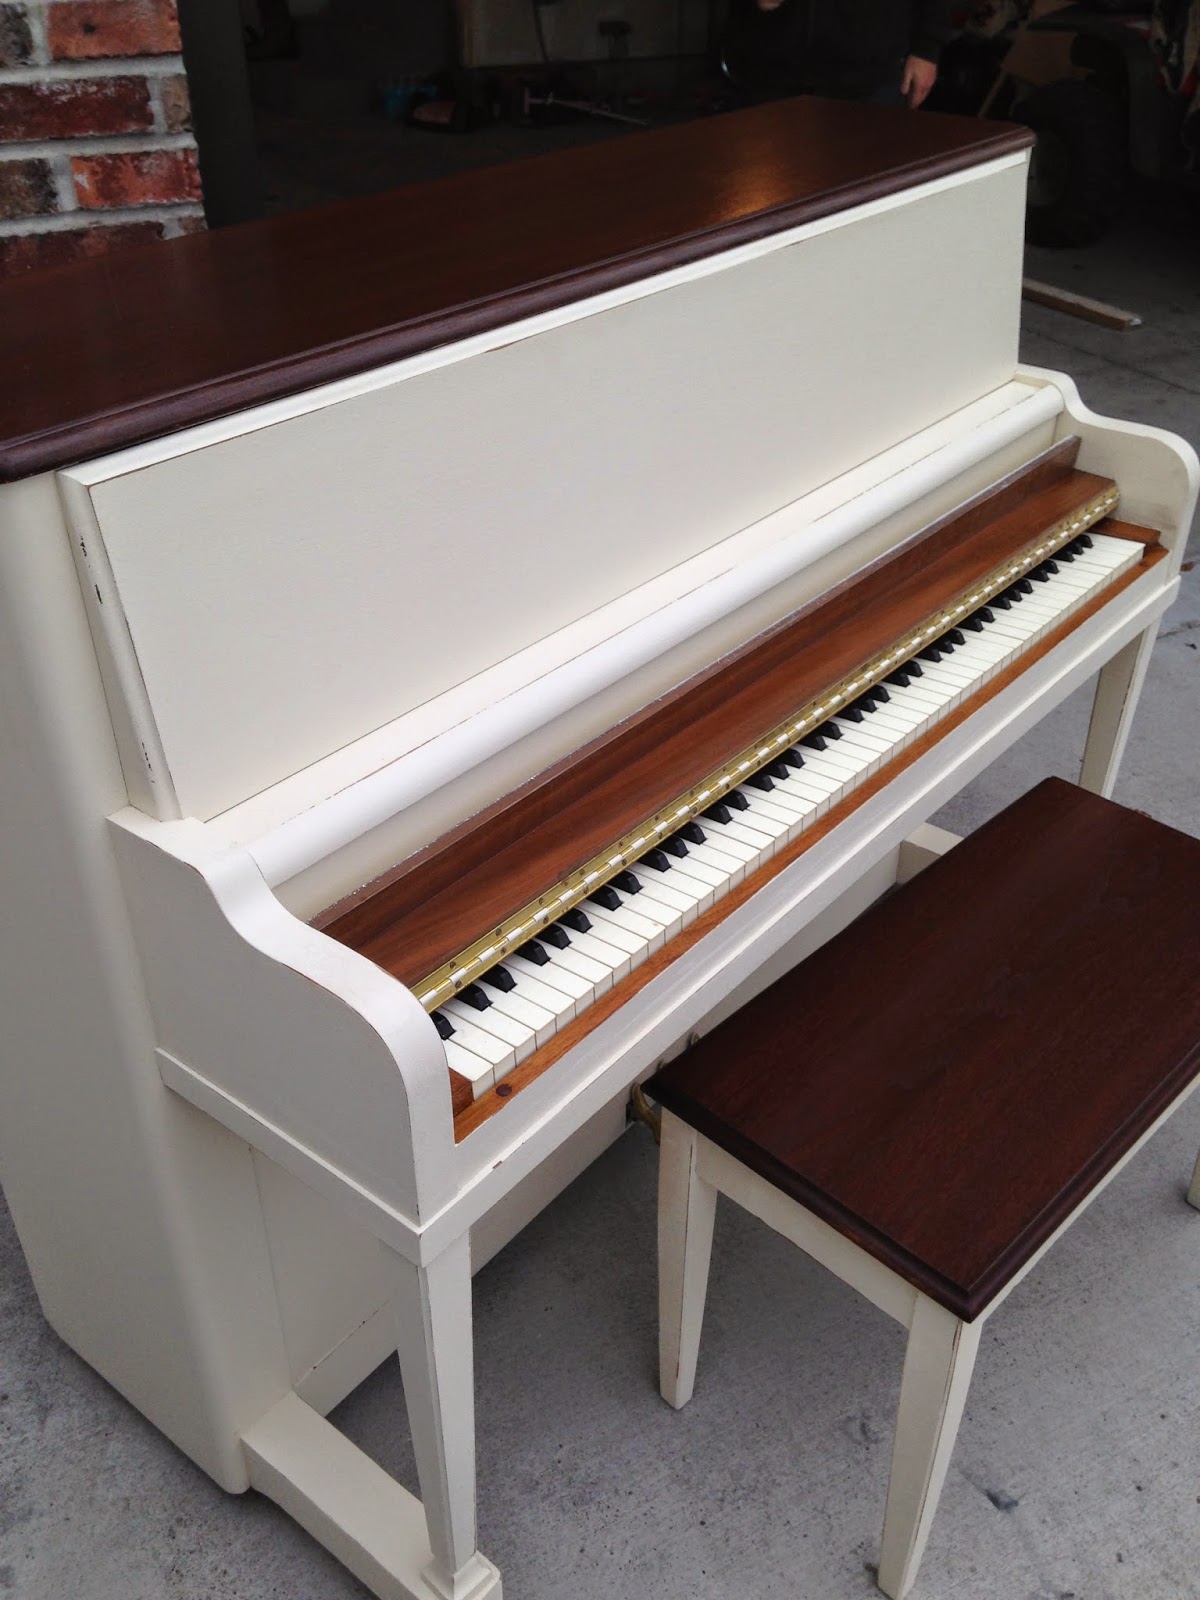
Pianos are beginning to be my favorite thing to refinish. 
They are complicated and take a lot of time, but they are so worth the effort in the end. 

This Piano has been waiting to be refinished for months, maybe longer! When I decided to sell it it went fast! It was bittersweet to let it go, but Im so glad how it all turned out, I'm not even sad about it! 

She started out like this... 
Just your basic piano. 
I loved the lines and simplicity of it. 
I knew it had great potential. 

When refinishing a piano PREP IS KEY! 
You can't use a electric sander, you cannot add nails, you cannot tape enough!! All of these things can damage the sound board if done wrong. It took me a few days to get it all ready for paint. I used a deglosser and liquid sander, as well as just elbow grease to sand down some rough spots. Then I sprayed it with my go to Antique White, Satin, Sherwin Williams Duration Paint. 
It took two good coats. 
Then I used a Dark Walnut Gel Stain to cover the top and bench. Gel stain is thick and gives a nice rich coat, it also dries faster and soaks in really well. Its amazing. 
Inside the keys I taped off really well to leave the original finish, I didn't want to lose the Logo or original detailing. I simply freshened it up with some liquid gold. 

After it was done I wiped the edges down with a dark glaze and quickly wiped it off, giving it a little bit of depth. 


 She is a stunner! 
We delivered it and it looks perfect in it's new home! 

Anybody have a piano they want done?!

A Vanity

Thursday, November 6, 2014
I like to Hunt for items for clients. 
A lot of times a person will come to me with something they are looking for- all I really need is a price range and I do the rest of the foot work! 

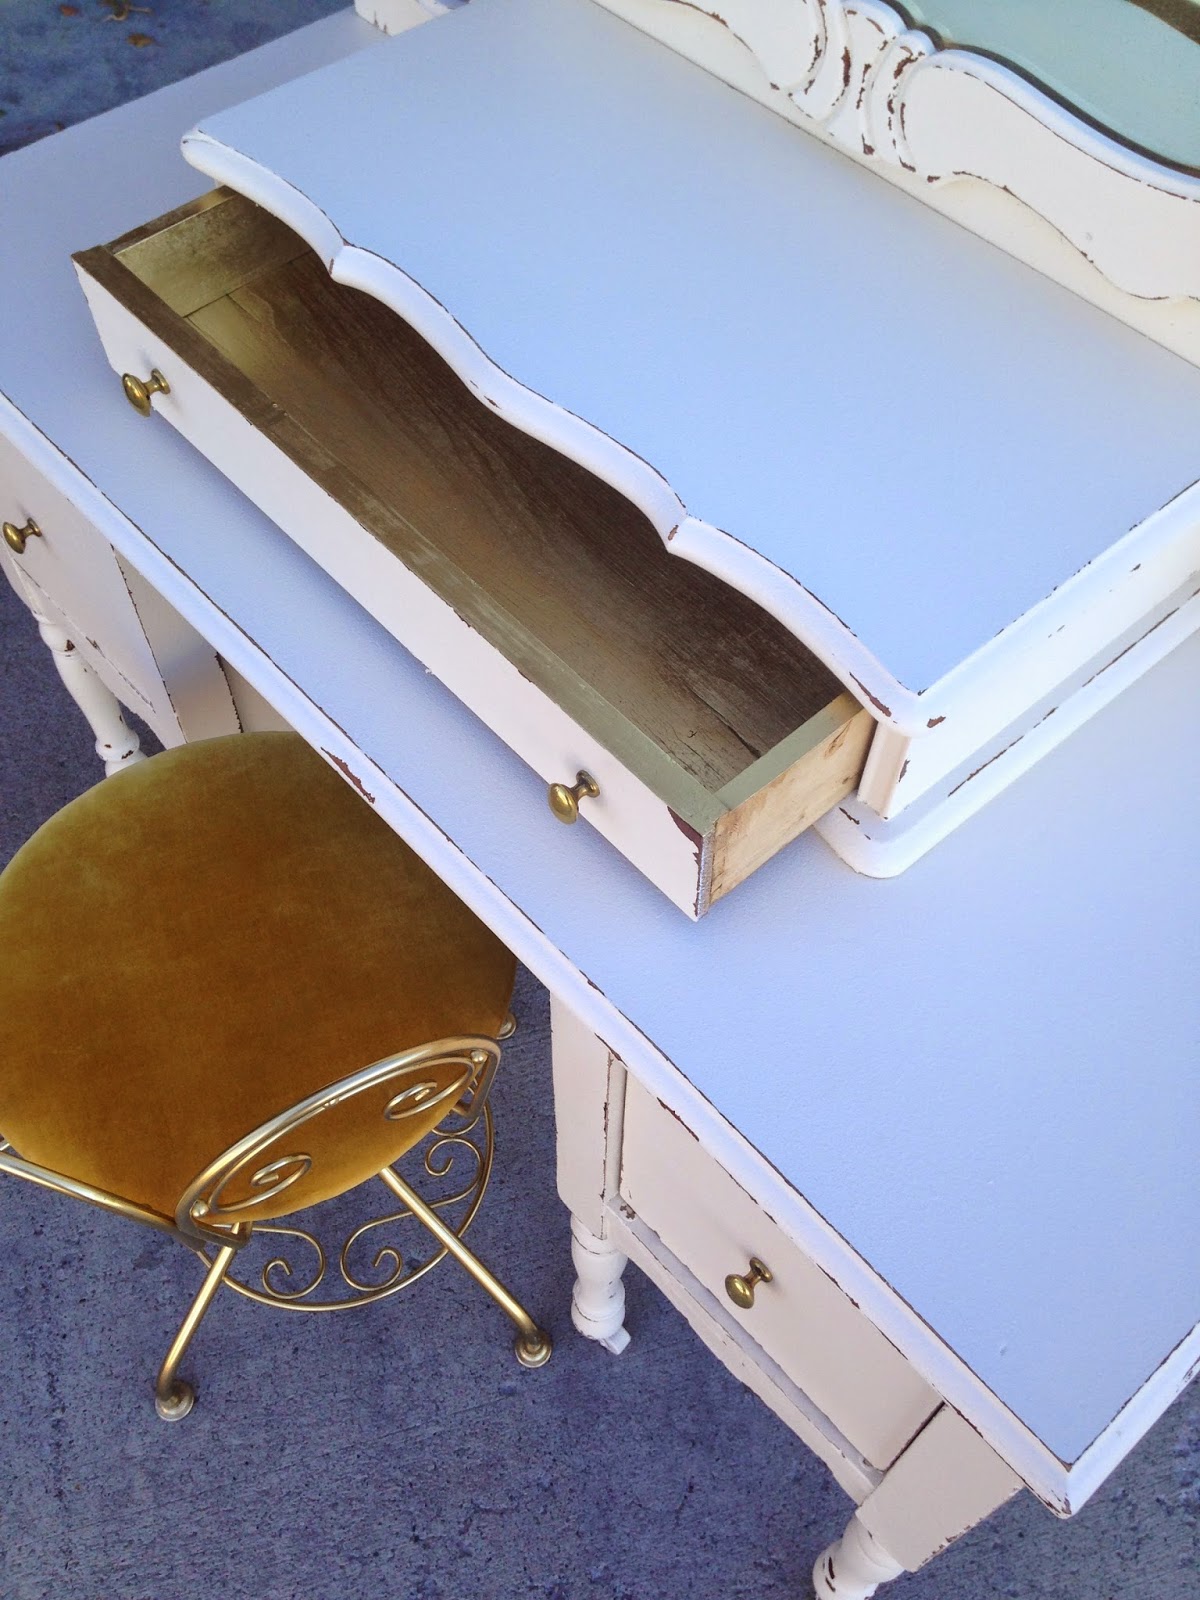
Like this fantastic vanity! 
My friend has one little girl- and four boys! She wanted a vintage looking vanity to put in her daughters room, as a Christmas gift. 

It only took me a few days and I found this amazing vanity. Once I saw it I knew it would be PERFECT! I bought it then and let my friend know. 

Then  I was able to strip it down and paint it a perfect Antique white, with lite distressing. I also painted the insides of the drawers gold. (The girls room will be white, gold, with light pink accents!) 


I later found the little stool from a lady I happened to buy some other pieces from, it fit perfectly!
 It will be recovered later- once we decide what material to cover it with! 

My friend also brought this great dresser over to have done to also fit in the same room. I hand painted all those little gold dots one by one! The pink is so subtle with the touch of gold, it makes my heart happy. I can't wait to see this room finished! 

I couldn't be happier with how this order turned out! 

Let me know if you are looking for something specific and I'll do my best to HUNT it down! 

A Upholstered Chair

Monday, November 3, 2014
My mother is the expert when it comes to upholstery, she usually is the one that does all of them. But it has been a goal of mine to learn it, and there is no better time than the present. 

My friend brought this chair over, a family member gave it to her for free! It already had great bones but was about 30-40 years old. It needed a little TLC.  
BEFORE:

The hardest part about upholstery for me is the beginning... the tear apart. 
You have to be careful to keep all your pieces in pretty good shape so you can use them as patterns. Sometimes that is difficult- especially when the fabric is so worn and old. 
But after a few hours, blisters, and a little blood I was able to get it down to the bones. 

The insides were in fantastic shape.  The client brought a big roll of material to be used to recover it and I was able to piece it together with only a few do- overs! 


 I learned a lot with this one! But it turned out to be a show stopper!
1. Stripes are hard! 
2. Cording, tack strips, and trim are your best friend.
3. Wear gloves.
4. If at first you don't succeed! Try Try again!

The chair has a cushion and she was able to recover that, so these pictures are shown without it, hence the bumpy base! 

 With the holidays coming up fast, let me know if you have something you would like done before then!

 
Designed with ♥ by Nudge Media Design